“If you limit your choices only to what seems possible or reasonable, you disconnect yourself from what you truly want, and all that is left is compromise. — Robert Fritz
In a previous post I described Protein Carbohydrate Goulash (PCG), an inexpensive method of creating backpacking dinners with vast variety, no cleanup, and a short cooking time, using ingredients commonly found in grocery stores. Now I describe experiments with a food dehydrator to see one might add even more choices for carbohydrates and legumes.
For each of these experimental trials, I re-hydrate by pouring 1/2 one cup boiling water in with a 1/2 cup portion of the food under test into a 1-quart freezer zip bag, sealing the bag, and waiting 5 minutes. Then I drain any remaining water, if any, and eat the food, testing for mouth-feel and whether the sample seems adequately cooked and re-hydrated. This will be referred to as the “rehydration procedure” for the rest of this post.
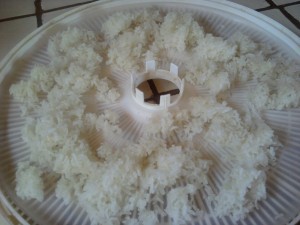
White basmati rice: 1 cup rice cooked with 2 cups water in a rice cooker, with a pinch of salt. Dehydrated on a fruit leather tray, not trying to separate clumps of rice very much. After rehydration procedure, rice was just the right consistency at 5 minutes. Recommended.
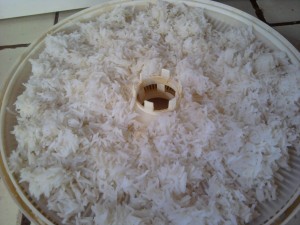
Brown basmati rice: 1 cup rice cooked with two cups water in a rice cooker, along with a pinch of salt to enhance shelf-life. Seemed a little crunchy after cooking, so will add more water next time. Yielded 400grams cooked. Spread onto plastic fruit leather tray in dehydrator, not bothering to separate all clumps. The sample dehydrated quickly (in dry New Mexico), retaining good grain appearance, and most clumps easily separated into individual grains. Dry weight was 185grams. After cooling, combined 1/2 cup of dry rice with 1/2 cup boiling water. After 5 minutes still a little crunchy, as before.
Cooked slightly less than 1 cup brown basmati with 3 1/2 cups water in rice cooker. Grains were more tender, more clumped, and slightly split. Dried to 181 grams. After cooling, combined 1/2 cup boiling water with 1/2 cup dried rice. Still too crunchy after 5 minutes, and even after 10 minutes. Not recommended.
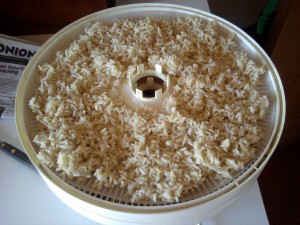
Red wehani (Lundberg) rice: 1 cup rice cooked with 2-1/2 cups water in a rice cooker was tender with a slightly nutty texture, tasty and aromatic. After dehydration and rehydration procedure, was still partially crunchy and not sufficiently softened. As this is a form of brown rice, this is to be expected. Not recommended.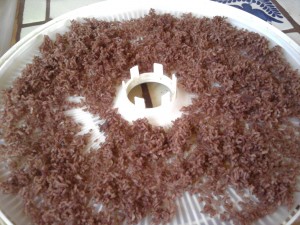
Black (forbidden) rice: 1 cup rice in water for two hours, rinsed and cooked with 2-1/2 cups water in a rice cooker produced firm long grains. After dehydration and rehydration, was significantly crunchy. Not recommended.
Short grain (Japanese-style white) rice: 1 cup rice with 1 3/4 cups water in rice cooker makes a sticky aromatic rice. I dehydrated in large clumps, yielding 210grams dry, and did not attempt to separate individual grains. After rehydration procedure, some clumps were still a little too chewy at 5 minutes.
Separated dried clumps into individual grains, using a few pulses in a food processor, and repeated rehydration procedure. Result was good consistency at five minutes. Next time will separate more before dehydrating. Recommended.
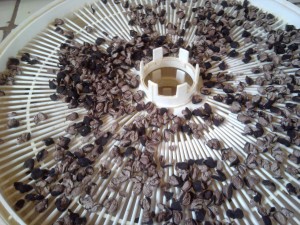
Black beans: 1 12ounce can of black beans, thoroughly rinsed. Noticed some beans were split along the side, which may affect re-hydration and ability to keep shape without mushing. Dehydrated at medium heat. Dry weight was 71 grams, and all beans partially open with some powder. Resembled “dried refried beans” item in the bulk foods section of grocery, except black beans instead of pinto. Fully rehydrated well under 5 minutes, but beans were partially mushed together like refried beans. Retained original flavor well, and may still be useful for bean soup or beans-with-rice dishes. Would other bean varieties retain individual bean shape better?
Tried again with a can of beans, drying at lowest heat setting. After rehydration beans stayed together slightly better, good enough to be used in rice-and-bean dishes. Recommended.
Garbanzo beans: 1 15ounce can drained and dried resulted in 131grams, partially split but all intact with no “powder”. After rehydration procedure beans were crunchy and not tender, and did not noticeably improve after 10 minutes. Not recommended.
Pinto beans: 1 15ounce can rinsed, drained, and dried resulted in 91 grams, partially split, with a small amount of breakage “powder”. Rehydration procedure resulted in partially crunchy beans after five minutes. Since pinto beans don’t have a thick skin, and the dried beans were mostly open, this is an unexpected result, so I repeated the rehydration trial, but doubled the hot water, with better results but still some crunchy bits. Not recommended.
(Ed note: Because this did not work, I have to wonder if I controlled for all the variables.)
Dried peas: Available in bulk food section of natural foods grocery as a snack. Retains green color and shape of peas, almost like freeze drying. After rehydrating for 5 minutes, was still slightly crunchy, like fresh peas instead of cooked peas. After waiting 30 minutes, still crunchy.
Next I tried partially crushing and splitting dry peas with the flat of a knife, and repeating the rehydration experiment. Still somewhat crunchy after 5 minutes, and also after 10 minutes. Not recommended.
(Oh well, it would have been nice if it had worked, but can still use them as a tasty snack for no-cook lunches.)
Black-eyed peas: One 15ounce can, drained and dried at lowest heat, yielded 77grams, with only minor splitting or breakage. The rehydration procedure produced good consistency and taste in much less than five minutes. Recommended.
Kidney beans: One 15ounce can, drained and dried at lowest heat, yielded 91 grams, with many beans split open but not breaking apart. After rehydration beans mostly retained shape and did not break apart. Took the full five minutes to get as soft as before drying, which was expected as this type of bean has a thicker firmer skin. Recommended.
Split peas: Cooked split peas, after dehydrating mostly retained shape without breakage. Rehydration procedure produced a mixture too-firm crunchy chunks and soft mush. Not recommended.
Mushrooms: 1 13.5ounce can of mushroom stems and pieces, drained and dried amounted to only 13grams, darkened and shriveled. After rehydration procedure ‘shrooms were still somewhat leathery and still tasted canned– not so good.
Fresh mushrooms sliced thin and dried retained their shape and color. After rehydration procedure shrooms had too much crunch.
Next I tried slicing mushroomsjust as thin as possible with a knife. These were almost the right consistency after rehydration, only slightly over-chewy.
Finally I tried using a potato peeler to shave ‘shrooms into paper-thin slices, and dried on a mesh screen. (Do not use the fruit leather tray.) After rehydration these were firm but not too chewy, still fragrant, and probably fine to be included in PCG with other ingredients. Recommended.
Whole wheat thin spaghetti noodles: Cooked 10 minutes until past al-dente to tender. Rinsed and chopped into spoon-size lengths and dehydrated on fruit leather tray. After rehydration procedure, noodles were al dente at 5 minutes. This works fine. Recommended.
Rotini: 1 cup cooked past al dente, cut each piece in half to fit better in a campers spoon (too labor intensive) then dried, weighing 101 grams. After rehydration procedure, not soft enough after five minutes. For comparison, did rehydration procedure on rotini that had not been cooked and then dried, and found this was way too crunchy. Not recommended.
So cooking pasta and re-drying appears to reduce cooking/rehydration time, but the thickness of the pasta matters. Butterfly noodles (farafelle) would be too thin, and angel hair pasta might cook fast enough even without precooking.
Rice noodles: Linguini-size flat noodles in the oriental foods section of the grocery, broken into 1cm lengths, with rehydration procedure were not sufficiently tender after 5 minutes. After cooking, draining, and drying, still were not soft enough after rehydration procedure. Side-by-side comparison showed precooking did not seem to reduce time to become tender. Not recommended.
We know that angel-hair style rice-stick noodles will soften within about 5 minutes. Was hoping to enjoy a nice wide rice noodle, but will need to settle for the thin skinny variety.
Conclusions
If you have a food dehydrator and a little time, pre-cooking and dehydrating thin wheat-based noodles, some legumes and rices, and thin-sliced mushrooms can be used to increase variety in fast-cook backpacking dinners such as PCG where you add boiling water and wait a few minutes.
Further study
All the successful trials of home-dehydrated food are being stored in 1-quart freezer zip bags at room temperature in darkness for three months, to verify shelf life and test re-hydration time and mouth-feel at the end of this period.
Addendum May 2012: Stored dried black beans, black-eyed peas, basmati rice, and thin whole wheat spaghetti noodles for two months, and performed the rehydration test and verified that each food tasted good with no hint of spoilage, and softened to a similar degree as in the original tests. Black beans and black-eyed peas now took a full 5 minutes to get to preferred level of softness, and noodles took 7 minutes. Did not notice a change in the basmati rice.
Related posts:
