Pasghetti

“Life is a combination of magic and pasta.”

— Frederico Fellini

In PCG I mentioned how a spaghetti facsimile could be created using ramen noodles and tomato cup-of-soup:

As an example, if you want to make a spaghetti meal, then choose ramen+pepperoni slices+tomato soup mix+dash of Italian seasoning+grated Parmesan cheese+group b.

Tomato instant soup mix has largely disappeared from the shelves here in the USA. I experimented in making my own by starting with canned tomato paste and spreading on a fruit-rollup sheet in my food dehydrator, about 1/4 inch thickness.

Drying tomato paste
Drying tomato paste

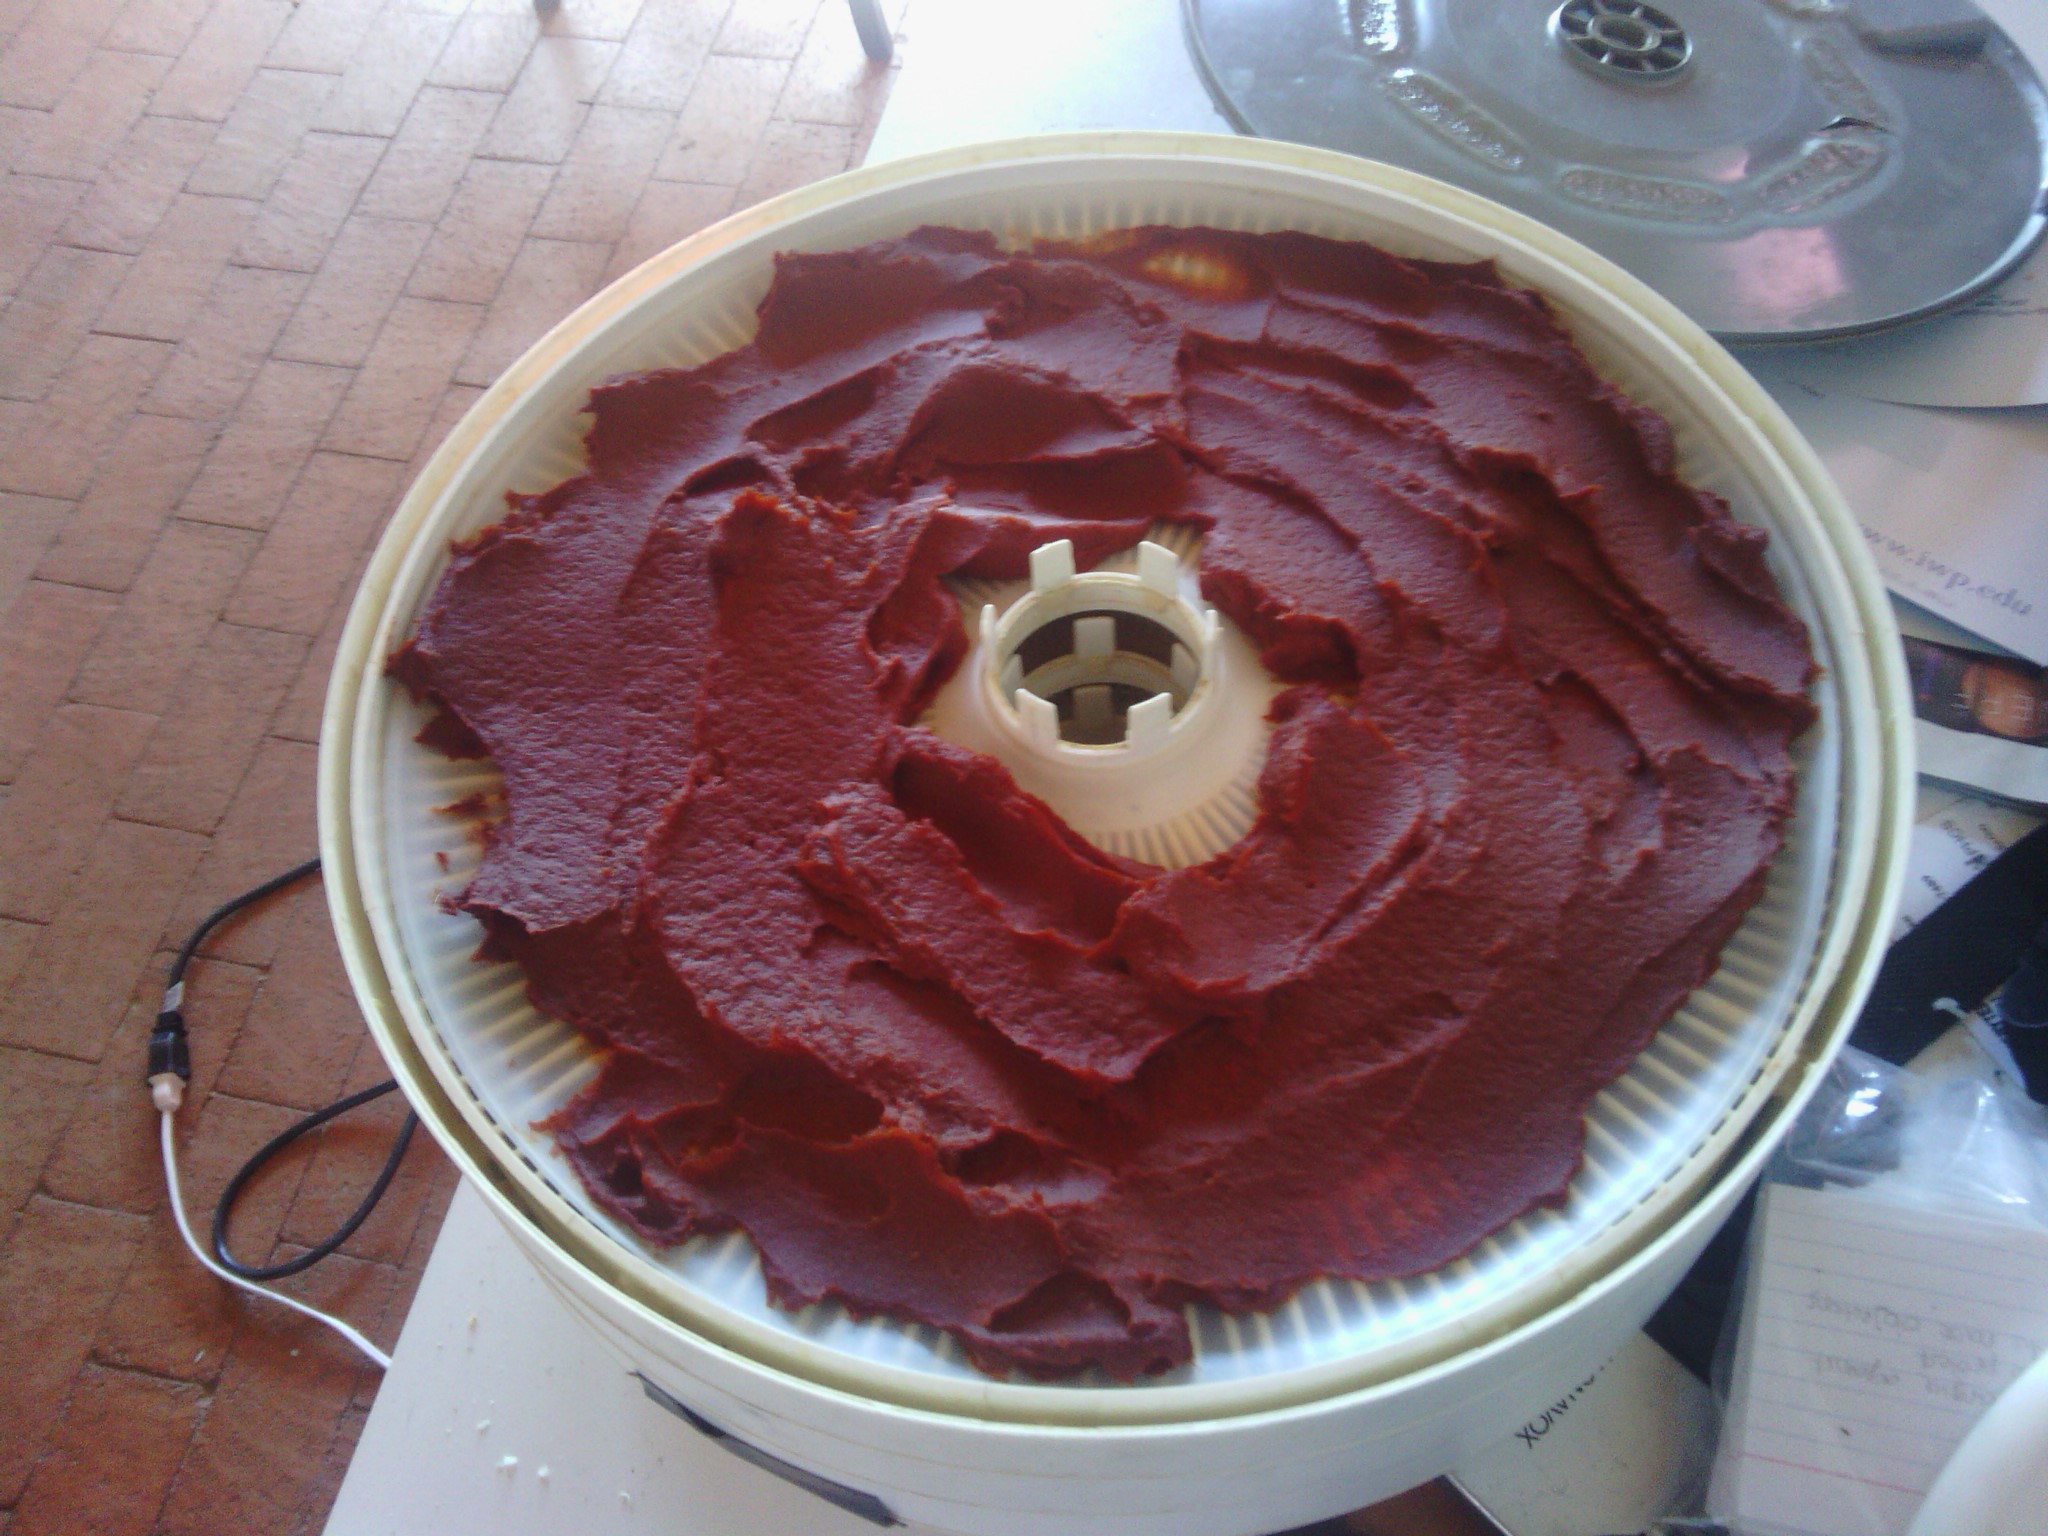
After drying at low heat for a few hours, peeling the “tomato rollup” and flipping and drying some more, I could still detect moisture trapped in the middle, so I cut into strips and dried some more.

Drying tomato paste strips

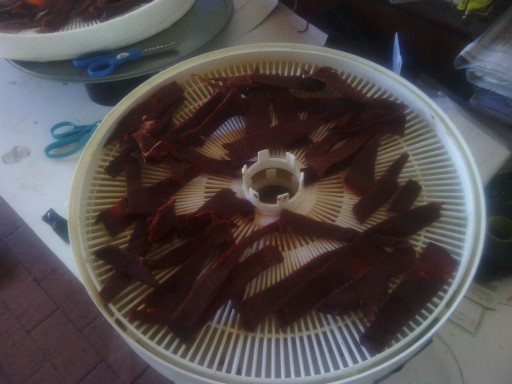
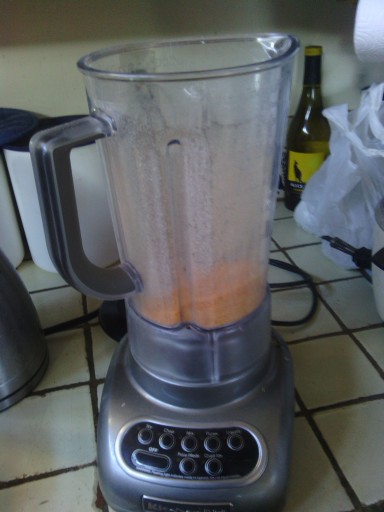
Finally, after a few hours, the strips reached the level of crispness that allowed pulverizing in a powerful blender.

Tomato powder
Tomato powder

One could add potato flakes as an anti-caking agent, but I did not need to since the powder would be added to other ingredients right away.

Prepare in quart freezer zip bag:
1/2 teaspoon onion powder (not onion salt)
1/4 teaspoon seasoned pepper
1/4 cup skim milk powder
1 package ramen, crushed, without the flavor packet
1/4 cup tomato powder
1/4 cup grated parmesan cheese
1/4 teaspoon Italian seasoning (adjust amount to taste)
(pinch of garlic powder)
2 tablespoons dried parsley flakes
(1 small one-ounce packet pepperoni slices)
(1 generous squirt of olive oil for valuable hiker calories)

To prepare on the trail, boil 1 1/4 cup of water, pour into bag, close bag, mush bag until mixture is more-or-less uniform, and rehydrate for five minutes until the noodles are ready. If using the optional pepperoni packet, add now. Eat from the bag for a no-clean meal.

(Sometimes I need to write up these recipes so I can remember just what I did, for the next big trip.)

Related Posts:


Enchies for the Trail

“If God dwells inside us like some people say, I sure hope He likes enchiladas, because that’s what He’s getting.”
— Jack Handy

New Mexico style enchiladas come either rolled or flat. Rolled is the kind familiar everywhere else. Flat enchiladas stack corn tortillas like pancakes, with cheese and chile sauce in between each layer (and no syrup or butter :-).

Flat enchiladas with red

My trail version uses tortilla chips, saved throughout the year from bags of blue corn tortilla chips where the little broken pieces at the bottom of the bag are too small for dipping salsa. Thicker tortilla chips work somewhat better in this recipe, compared to thin “restaurant style” chips, since they get less mushy during rehydration. In consistency the trail version resembles flat enchies more than rolled, and like many trail recipes can be appreciated much more a few weeks into a long trip when hiker-hunger makes simple meals taste delicious. Perhaps this version is more like an enchilada casserole, or frito pie if you add the dried beans. (Know that frito pie is not ever really a pie.)

Our recipe follows the PCG dinner template, with cheddar cheese powder as the protein choice, crumbled tortilla chips as the carb, and New Mexico red chile powder as the spice. (Note that we skip the instant soup mix because we have enough salt with the tortilla chips and additional cheese.)

Prepare in quart freezer zip bag:
1/2 teaspoon onion powder
1/4 teaspoon seasoned pepper
1/4 cup skim milk powder
2 to 3 ounces broken tortilla chips
1/4 cup cheddar cheese powder (see below)
2 teaspoons Bueno or Chimayo mild New Mexico-style red chile powder (adjust amount to taste)
(1 small foil packet chicken for chicken enchies)
(1 generous squirt of olive oil for valuable hiker calories)

To prepare on the trail, boil 1 1/4 cup of water, pour into bag, close bag, mush bag until mixture is more-or-less uniform, and rehydrate for three to four minutes until ready. If using the optional chicken packet, add now. Eat from the bag for a no-clean meal.

Before my last long hike I ordered cheddar cheese powder through Amazon, a one pound bag for $13.79 with free shipping. (For small quantities, just steal the packet from a box of macaroni and cheese, but I needed a larger amount.) For my upcoming hike I want to make my own cheese powder– just to see how well it works, and possibly to save a few nickels.

Searching the web for ideas on drying cheese, I found this video:

The process requires blotting the shredded cheese frequently to remove grease. I wondered if it is possible to melt the cheese and skim off the fat prior to shredding, to eliminated the need for blotting. In a comment thread for this video someone mentioned starting with low-fat or no-fat cheese so one can skip blotting. I found fat-free shredded mild cheddar cheese at the local grocery, and purchased a bag to experiment.

A 7.5 ounce bag of no-fat shredded mild cheddar, cost us $2.50 on sale, dries on the plastic fruit roll-up tray in my food dehydrator in a few hours at low heat to half its original weight.

Drying cheddar
Drying cheddar

A blender or food processor makes a coarse powder from the dry cheese.

Cheddar becomes powder

You might try further grinding with an electric flour mill to produce a fine cheese powder, but we got good results without this step. We tested with the enchilada recipe: ¡Que bueno!

Related Posts


Trail Food Recipes with Long Shelf Life: Cooking

Logan Bread

Used this recipe, which makes a massive amount. Consider halves or quarters. As suggested in this post, I added a cup of whey protein powder. Before drying at 200F it tastes and smells exactly like gingerbread, with crunchy and chewy bits. One might double the amount of dried fruit and nuts if desired.

Cut into 2″ x 3″ pieces and spread out to dry at 200F, the result was very hard and will definitely require dunking in tea or cocoa to soften. Perhaps cutting into thinner slices a la biscotti prior to drying would work better.

Hardtack

Although not altogether practical as a modern trail food, I couldn’t resist baking some for historical purposes. Eat some while passing near Civil War battlefields.

Impressively hard when baked, these tiles will survive any jolts inside your food bag. If weevils are present, one should revel in the historical authenticity.

Anzac Biscuit

Tasty, but surely these are not sturdy enough to survive a long journey in your pack without major breakage.

Carefully packed in biscuit tins, they are known to survive an ocean journey, but perhaps not your food bag sans tin. I will try drying out a few as with Logan Bread, to see if that makes them more impervious.

Pemmican

[To be added later.]

Related Posts: