Jim (trail-name Sagebrush) codes audio software for Windows, Linux, Android, and embedded systems. When not working at sagebrush.com, he enjoys backpacking, which this blog is about.
“I knew the wild riders and the vacant land were about to vanish forever… and the more I considered the subject, the bigger the forever loomed. Without knowing how to do it, I began to record some facts around me, and the more I looked the more the panorama unfolded.” — Frederic Remington
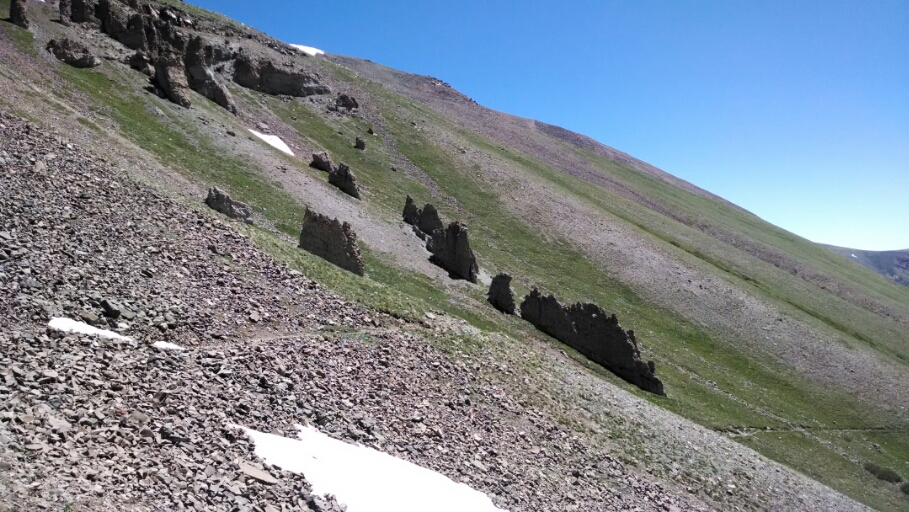
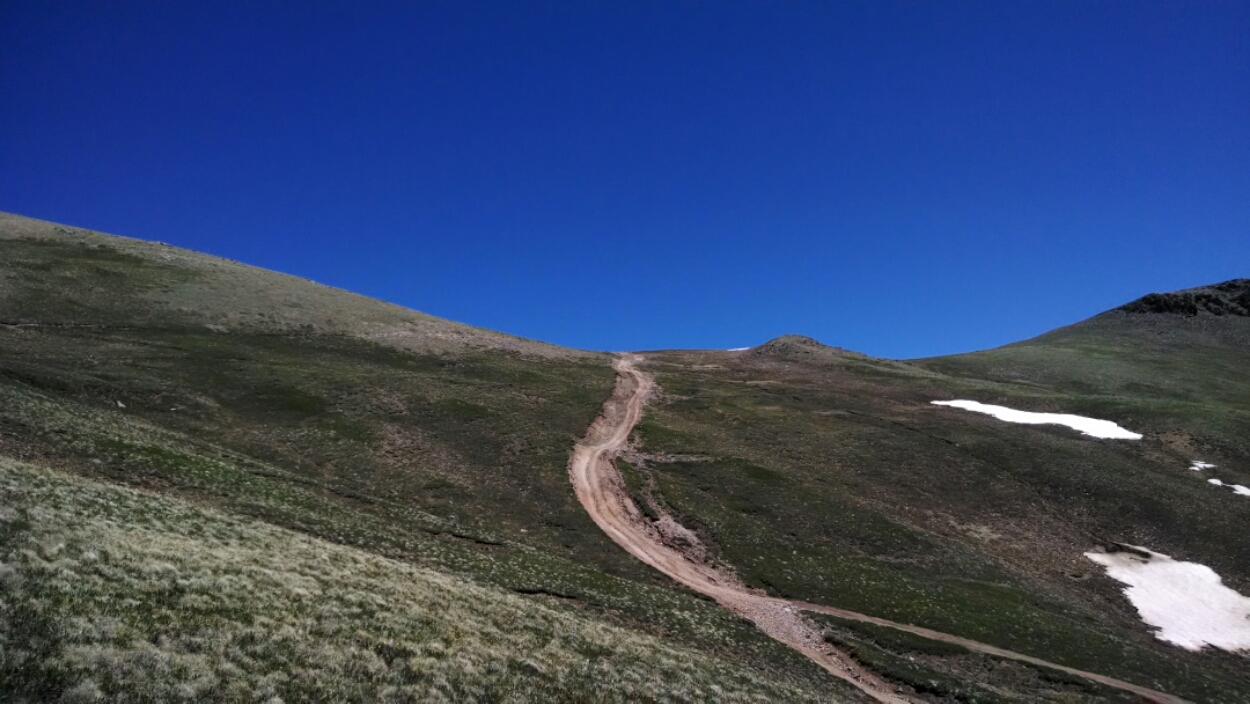
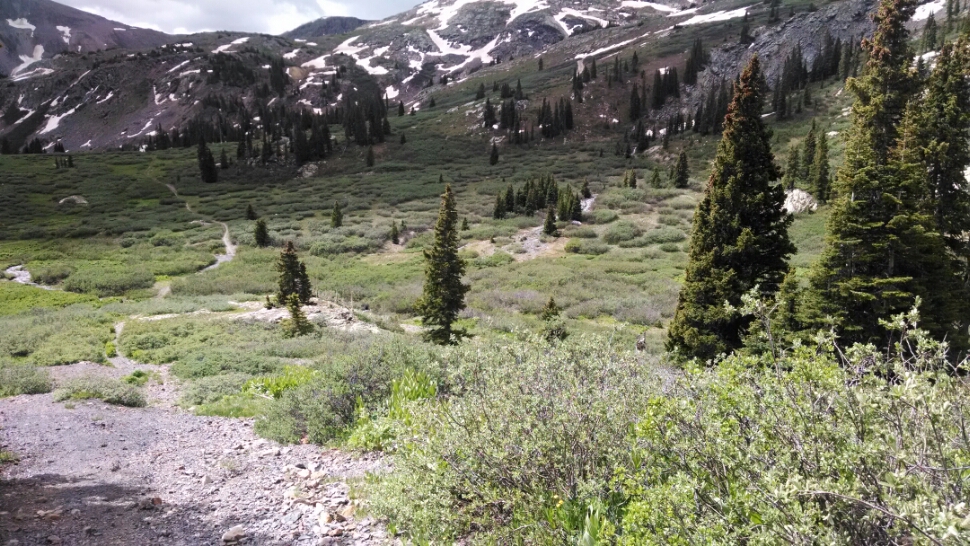
On my recent long hike I took several overlapping photos of certain views to stitch together later into wide-angle pictures using software. Below you can view results of this experiment. In a few locations I was not consciously trying to make a panorama, but there was enough overlap between consecutive shots to stitch together a wider view anyway.
My camera was nothing great, just a low-end Android smart phone with 3.2 megapixel resolution. I first tried the software package Hugin, a free open-source package that runs on Windows or Mac. This video tutorial helped me quickly learn how to use the program effectively.
One problem I notice is that exposure can vary quite a bit depending on angle relative to the sun. My camera was set to automatic exposure, and standard advice for panorama shots is to disable all automatic features. Oops, too late to go back now and re-shoot. And anyway, it is far from obvious how to disable auto or lock current settings on an Android camera app.
Note the exposure transition on the left third of the image
Although Hugin has many manual settings that might overcome the exposure settings problem above, I did not find them easy to use. The free Image Composite Editor (link no longer works) from Microsoft seems to handle exposure correction rather well automatically.
“I remember sitting around with friends and putting together a slideshow, popping chromes into the tray, turning on the stereo and hanging up a sheet in the living room. I loved that immersion with all your senses.”
— Mark Adams
Here is a slideshow of my 2012 Appalachian Trail journey.
Black Diamond Ultra Distance Z-pole with carbide tips minus straps
263
9.3
.
cap
REI runner cap
56
2.0
.
.
Total worn/carried
1794
63.3
.
.
pounds:
4.0
.
.
.
pack
pack
Gossamer Gear Murmur backpack
246
8.7
.
pack liner
trash compactor bag
60
2.1
.
cell phone holder
improvised from cheap camera case tied to strap
49
1.7
.
phone
Android phone: Intercept (camera, GPS, etc)
140
4.9
.
.
Cook/water
water bottle
1 liter cranberry juice bottle
54
1.9
.
camp water container
2x 1 liter Platypus
57
2.0
.
cook stove
Caldera system with alcohol stove in plastic cannister
133
4.7
.
fuel bottle
Trail Designs 5.5oz plastic bottle for methanol
22
0.8
.
butane lighter
Scripto Tiny Lite
12
0.4
.
cook pot
0.5Liter Evernew Titanium mug-pot with lid
74
2.6
.
pot cozy
homemade with Reflectix
25
0.9
.
spoon
lexan
9
0.3
.
water purifier
SteriPEN Freedom (rechargeable)
76
2.7
.
water purification backup
repackaged Potable Aqua tablets
10
0.4
.
food bag
Sea to Summit 17Liter dry bag
97
3.4
.
rope
ZPacks 1.5 mm Z-Line Cord
21
0.7
.
.
Shelter
tarp/tent
ZPacks Hexamid solo tent w/screen
269
9.5
.
tent stakes
6 Tite Lite titanium stakes
37
1.3
.
.
Sleeping
sleeping bag
Western Mountaineering SummerLite
571
20.1
.
sleeping pad
Gossamer Gear NightLight_Torso
101
3.6
.
ground cloth
Polycryo medium size
42
1.5
.
.
Clothes
camp shirt
SmartWool Microweight long sleeve crew
171
6.0
.
spare shorts
GoLite men’s nylon shorts
132
4.7
.
tights
SmartWool lightweight bottom baselayer
148
5.2
.
warm top
Western Mountaineering down vest
.
warm hat
plush Polartec fleece beanie
36
1.3
.
rain jacket
GoLite Malpais Trinity
217
7.7
.
wind shirt
Montbell Tachyon anorak
63
2.2
.
rain gloves
Mountain Laurel Designs eVENT rain mitts
38
1.3
.
bandana
AT logo cotton/poly bandana
30
1.1
.
compression socks
Truform calf length medium compression
42
1.5
.
spare socks
SmartWool mid-calf merino
91
3.2
.
.
Misc
head net
“Sea to Summit” mosquito net with pyrethrin
23
0.8
.
first aid kit
band-aids, molefoam, profen, sudafed, …
61
2.2
.
sewing kit
home assembled
20
0.7
.
tooth care
dehydrated dots of toothpaste, toothbrush with trimmed handle, gum brush, floss
17
0.6
.
soap
Dr Bonner liquid in 0.5oz dropper bottle
24
0.8
.
moist-wipes
8 wipes in zip bag
75
2.6
.
toiletry bag
no-see-um mesh bag 5″x6″
4
0.1
.
mirror
imagerefliector.com credit card size
7
0.2
.
magnifying glass
plastic salvaged
2
0.1
.
bandana
AT blue, cotton blend
35
1.2
.
wallet with id
all-Ett sport sailcloth wallet (5g) plus cards
30
1.1
.
repair kit
duct tape, foil tape, sealer, etc
25
0.9
.
backup fire starter
Spark-Lite + 3 tinder wads
6
0.2
.
pen
ballpoint refill cartridge + spare
1
0.0
.
flashlight
Petzl e+Lite
27
1.0
.
usb charger
for phone, Steripen, and battery pack, from Blackberry
23
0.8
.
spare cell phone battery
extend phone life
30
1.1
.
usb cable
9inch microUSB cable
13
0.5
.
recharger pack
mophie juice pack powerstation
128
4.5
.
headphone
Apple
5
0.2
.
itenerary+journal+guide
only carry pages needed for that week
20
0.7
.
insect repellent
100% DEET repackaged in 0.5oz dropper bottle
23
0.8
.
sun screen
liquid, repacked in 0.5oz dropper bottle
24
0.8
.
scat shovel
Tite-Lite V-Stake titanium tent stake, also used for tent
10
0.4
.
toilet paper
partial roll, remove cardboard tube, in zip bag
20
0.7
.
knife
Victoronix Swiss Army Classic
18
0.6
.
accessory bag
no-see-um mesh bag 7″x9″
8
0.3
.
.
Total base weight
3752
132.3
pounds:
8.3
Pack with food and water weighed 17 pounds at 501 Shelter
General Thoughts: Naively I assumed before getting on The Trail that a significant fraction of hikers would be using ultralight equipment. In practice, few hikers were going ultralight– less than one in twenty, and those tended to be older with more money to invest in leading edge lightweight gear. (One hiker theorized that I might be encountering sampling bias, that most 20-something ultralight hikers would be further up the trail since they could hike faster.) Most thru-hikers I encountered started in Georgia in mid-March, and the prevailing consensus was that with being on the Trail for six months straight, one did not want to sacrifice comfort at the expense of lower pack weight. (I disagree, but am definitely in a minority here.)
Some hikers were quite interested in discussing ultralight techniques with me, but the subject bored and annoyed other hikers within earshot. I was and am glad to discuss equipment up to a point, but I concede that some people obsess with gear too much, and that the lightest pack will still not pull you up the mountain.
Shirt: Most thru-hikers seemed to prefer polypropylene, but I like merino wool because it does not readily absorb body odor. The short-sleeve shirt I started with needed to be replaced by Vermont, especially since I cut the sleeves off to survive a heat wave in Pennsylvania. The replacement was an Icebreaker merino shirt which I can recommend.
Shorts: Shorts I started with were cut long, as is the current fashion, and rubbed my thighs and felt uncomfortable when hiking all day. Running shorts do not have front pockets, which I really want to hold the small snacks I munch on all day long on the Trail. Finally I found shorts at Cabelas made of nice thin nylon that only came to mid-thigh.
Shoes: The Moab was definitely the most common shoe on the Trail this year. It is one of the few trail-runners available in wide sizes, which is an essential requirement for me. The toe-boxes on mine started to separate from the shoe around Vermont, caused by numerous exposed roots making me trip and stress the toe area. I tried to have a replacement pair shipped, but they got lost in the mail. Liberal amounts of Shoe Goo kept my shoes together long enough to finish the journey.
Insole inserts: After the first three weeks on the Trail my feet were sore, knees and ankles swollen, and shins splinted. I was in danger of needing to stop the hike early. It was my fault– instead of gradually ramping up my daily miles I was trying to keep up with thru-hikers I had met and matching their twenty mile days in Maryland and southern Pennsylvania. That was a big mistake. Finally a thru-hiker sat me down and lectured me not to ignore my injuries and to slow down, get a good knee brace, and try Superfeet insoles, which I did notice were very common on the Trail. I had tried these insoles before, but found them hard and uncomfortable. A hiker explained that it might take three or four weeks for my feet, calves, and even knees to adjust to the insoles, but that I should be patient. I took two zero days, tried the insoles and knee brace and and cut back to no more than fifteen mile days for a while and my legs got better and I finished the journey to Maine. I do not know what thing I changed helped the most, but the important point is to change something (or several things) when you run into problems.
Socks: I started with low-cut running socks to save weight, but discovered that leaves and dirt got inside too easily. I changed to mid-length merino socks, which worked much better. Some hikers used spandex gaiters to keep out debris, which I might consider on a future trip.
Knee brace: When I ran into knee problems (see above) a thru-hiker strongly recommended the Cho-Pat. I ordered one and it worked quite well. While waiting for this brace to arrive I used a generic drug-store knee brace with adjustable velcro straps, and the velcro lost adhesion when wet. The Cho-Pat used much higher quality velcro that never lost its grip. Different knee problems might require different braces, so your results may vary. Later I banged up my other knee real bad on a boulder, and had to switch the knee brace to that knee for the rest of the trip.
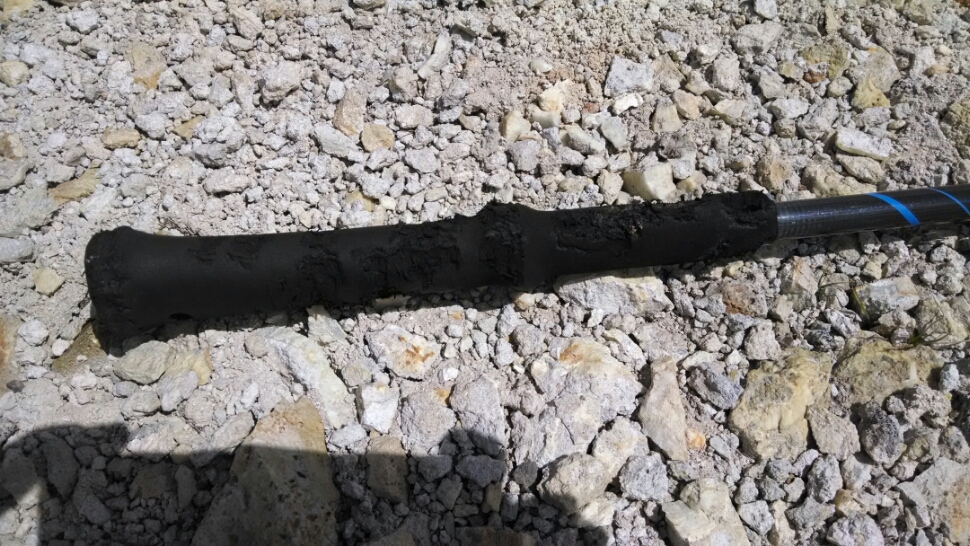
Trekking poles: My poles were supremely light weight and a joy to use. The fixed length was not a problem, since the grips provided a lower place for the hand when going up steep climbs. They also folded up quickly, and I was able to stow them in the outer webbing of my pack without removing the pack or even breaking stride. The light weight came at the price of lower durability. After the first pole broke in Vermont, I ordered a second pair for backup. By Katahdin three poles had broken, each with different failure modes. I was reduced to hiking with a single pole at the end. I do hope the manufacturer is able to figure out how to make these poles more durable and keep the low weight.
One of several trekking pole failure modes
Cap: My light runners cap served me well. I also started with sunglasses, but they tended to break when stored in the pack, and were rarely needed in the ‘green tunnel” of the AT. The cap was also useful with a hood during rainstorms to keep water off my face. Used with a bandana as a “sun hat”, or to protect ears from buzzing gnats.
Watch: One thing missing from my original equipment list is the Axio Mini altimeter-temperature wristwatch. This piece of kit gave nothing but problems, and eventually needed to be mailed away. First the battery needed replacement, then the battery contact became intermittent and required a field repair, then the altimeter stopped working, then the display got fogged from moisture leaking inside, and finally the watch stopped working altogether. The temperature function was never practical, since you had to remove the watch and wait several minutes for an accurate reading.
Pack: The Murmur is wonderfully light, with good placement of a large outer web pocket and durable side pockets to hold frequently used items. The stitching began to fail by Maine, and required field repair with dental floss. The web pocket endured a few holes caused by chipmunk bites: Setting your pack down for even a minute to go to the privy gives these critters an opportunity to chew through the webbing to get at granola bars.
Murmur pack
The suspension system on the pack is minimal. Fifteen pounds feels great, but more than twenty is uncomfortable.
One tiny drawback: The pack is so small that you do not look like a “real hiker” when hitchhiking, so motorists are less likely to stop and give you a ride. :-)
Pack liner: I used the plastic bag only when rain was imminent, as it was inconvenient to open to get quick access to gear. The thicker plastic of the trash compactor bag was plenty durable for the trip.
Cell phone holder: Carrying the cell phone in a front pocket was too awkward– the extra weight would swing back and forth. Since I used the phone many times a day to take photos and refer to the trail guide, I needed a way to keep the phone close at hand. I found a cheap padded camera case at a drugstore and tied onto a pack strap, which worked great.
Improvised cell phone holder on pack strap
Phone: Used for camera, e-mail, podcasts, and pdf reader for trail guide, which I consulted frequently during the day. Battery life was a problem. The only cell carrier with good coverage on the AT is Verizon, which I did not have. A snack-size zip bag served as a waterproof case during rainy weather. The phone was tough enough to survive several drops during the trip.
“Companion” (Appalachian Trail Thru-Hikers’ Companion), available in pdf form from the ALDHA, was awkward to view on the cell phone pdf viewer. Landmark mileage tables and landmark details are separated by several pages, so I had to do a lot of scrolling. Still better than carrying the extra weight of the dead-tree version.
Water bottle: My one-quart used cranberry juice bottle fit perfectly in the pack side pocket and was durable enough to last the entire trip.
Water containers: Two Platypus liter containers worked great to store water at camp, or on extra-dry sections of the Trail. Durable, folds down small, and light of weight, and handy to get into tight places to gather tiny trickles of water at slow moving streams.
Platypi as improvised cold pack
Cook stove: A Caldera stove with wind screen and pot support worked well, but required a plastic container to hold the wind screen. On the AT I experienced very little wind, so a side-burner stove that supports a pot might work just fine and would take up less pack space if it was sized to nest with the fuel bottle in my pot.
Caldera stove
Fuel bottle: The trip started with a 12-ounce soda bottle, but this was too large for the amount of fuel actually used. Unlike my first AT hike I was only heating water for dinner, not for breakfast (and a warm bath in the evening), so a smaller bottle that nested inside the cook pot was used, one that originally shipped with the Caldera stove. This smaller 5.5 oz bottle tended to leak, so I had to improvise a seal using a zip bag.
Cook pot: Almost only used to boil water or as a mug for tea, so rarely need to clean.
Pot cozy: My cozy was durable enough to last the entire trip, and did a fine job keeping dinner warm.
Pot cozy made from Reflectix
Water purifier: The rechargeable Steri-pen was a joy to use. I did not have to wait more than five minutes for purified water, so less needed to be carried. Battery life was good enough to last the five to seven days between recharging at the next hostel.
The pen is too wide to fit through the opening of most water bottles. I found a bottle that would allow part of the pen to fit inside, but the bottle had to be completely full of water for the electronic water sensors to be submerged and turn on the UV light. On the plus side, it was impossible for the pen to drop down into the water and cause a leak that might result in failure of the device.
Water purification backup: Iodine tablets were only needed once or twice. When repackaging to save the weight of the glass bottle, you will discovered the iodine tends to sublimate and stain any plastic bag used as a container, so wrap tightly in aluminum foil first.
Food bag: I started with a stuff sack but switched to a dry compression bag after seeing them used by most thru-hikers. The compression bag is compact, easy to hang, and rides better in the pack compared to a regular stuff sack.
Bear rope: It worked, and the bright color helped me remember which tree I used to hang the food.
Tarp/tent: I tended to use shelters when possible, but you always need a backup plan when the shelter is full or too far away or too buggy. The tent-tart is amazingly light weight and worked well enough in down-pours. Condensation from your breath is an issue, so stay away from the sides. Blowing rain can be a challenge. I loved the integrated bug net. Consider getting the extended beak in rainy conditions. The cuben material folds to a very small volume, taking up a small volume of space in the pack. When bundled inside the included stuff sack, it made a comfortable pillow at shelters.
Tent-tarp
Tent stakes: Even after spray-painting the tops of the stakes with fluorescent paint they were easy to lose, so replacements needed to be included in mail drops. No titanium tent stake ever bent– quite a change from the aluminum stakes I used in previous outings. For wooden tent platforms, common in New Hampshire, I used tiny cupboard hooks which screw into the wood.
Sleeping pad: The torso-sized foam pad, which doubled as pack back pad, was comfortable enough for my back but might be too Spartan for others. When sleeping my feet needed extra padding, so spare clothes were bundled in the bug net and used as a foot pillow.
Sleeping pad
Ground cloth: This plastic material is thin but tough, and was used on top of the bug net flooring of my tent-tarp. Since it folds up so small, it remained inside the tent when folded and put away.
Camp shirt: Thin enough for warm nights, but still good as a base layer for cold wet evenings, this merino shirt was stretchy and comfortable for sleeping.
Spare shorts and long johns: Zip-off paints did not work well as camp pants because they felt too confining after a long hiking day. Thin merino tights were used in cold weather, and running shorts on warm nights.
Sleeping headgear: My polartec beanie is comfortable on chilly nights. Do not use as a pot-holder, because the material melts at a lower temperature than you might think.
Rain jacket: When not used for rain or cold weather this jacket could be tucked into one of its own pockets, to make a compact pillow at night.
Wind shirt: Light of weight, but comfortable in windy conditions on the exposed peaks of New Hampshire and Maine.
Wind shirt was used on most high peaks
Rain gloves: A good idea, but the seam seal on mine failed and never kept hands dry.
Bandana: Tied on a pack elastic band to be easy to reach, used as pot-holder, sweatband, hankie, wash-cloth, and with cap as sun hat and fly flap.
Compression socks: By Pennsylvania my feet and calves would swell up at the end of the day, especially if I do not wear socks at night. The gentle compression of any socks seemed to reduce the swelling. Thin elastic compression socks that come up high on the thigh worked the best. Swelling continued for several weeks after the hike, but finally disappeared.
Spare socks: Slogging in the rain all day is made bearable by knowing that dry socks await the feet when you finally get to camp.
Head net: Useful at night for keeping gnats and mosquitoes at bay. Also used as a clothes bag, and since the material is semi-transparent it was easy to find and retrieve items.
Soap and wet wipes: I often got into camp late in the day, and one or two wet wipes allowed me to clean off trail dirt and keep odors down to a socially acceptable level when a fully trail shower was not practical. Ultralight hikers may omit this item– I compromised by making a single wet wipe go a long way.
Pen: OK, I used a pen refill to save weight, and with practice it began to feel as comfortable as a real pen. Do not keep in your pocket, as it will leak when exposed to water. Expect strange looks from other hikers if they see you write with one of these.
Flashlight: My headlight is easy to aim, efficient with batteries, and comfortable to wear around the neck at night while sleeping to stay handy. The light output was not powerful enough for night hikes.
USB charger and cable: This Blackberry wal-wart is compact and lightweight. The only way to make it better is to allow two devices to be charged at the same time.
Spare cell phone battery: A good idea, but not enough spare juice. I needed the gadget below.
Recharger pack: I ran into problems in Pennsylvania with low charge on cell phone batteries, especially after one town stay that did not have electricity nearby for charging. The two cell batteries did not seem to like long periods of time at low charge, and one battery stopped charging altogether. One thru-hiker recommended a “mophie”, which I ordered, and it solved all my charging problems. It is heavy at 145 grams, slightly heavier that my cell phone, but I reluctantly accepted the extra weight and was glad to get through the Hundred Mile Wilderness with no worries about low charge. I really appreciated the built-in charge level indicator, and the feature that turns the charger off when a device under charge is unplugged.
Headphone: A dollar-store headphone broke quickly. A genuine Apple headphone survived the rigors of the Trail and allowed me to listen to podcasts in the afternoon, which gave me a psychological boost when gazing at the beauty of the outdoors was no longer quite as effective for motivation.
Itinerary+journal+guide: One sheet of paper per day served as a written journal. At the next mail drop I mailed off the pages, using envelopes and stamps included in the food box waiting for me. That way my family got frequent long letters describing my journey, which would later be assembled and transcribed in journal form. Each sheet was photographed before mailing, to guard against lost mail.
I could have saved weight by typing on my cell phone, but that proved too slow. I recently have seen just how fast (young) people are able to type on a cell phone screen. On future trips I would practice beforehand to get my thumb-typing speed up and use my cell phone as a journal. Or if I was on a trip that involved a great amount of solitude (CDT) then an audio journal might be practical.
Pages of the current section of the trail were included in mail-drops and carried as backup in case my cell phone ran out of batteries.
Knife: The scissors are soooo useful!
Accessory bag: Mesh bag is durable, semi-transparent, and does not make crinkling noises like plastic zip bag. Contains most small items not already in toiletry bag.